I often receive questions about not able to download Java projects from Github in Eclipse and sometime not able to create and import as Java project even if they are downloaded from Github and exists in local repository. Initially, I didn't write about it because I thought it's too fundamental and probably everyone knows about it but receive this question again yesterday, I thought to document all the steps for once and all. To be honest, it's not so difficult if you have right plugins and little bit familiar with Git, but, yes, for Git beginners, it can be confusing. First, you have to deal with Git e.g. what is push, pull, fetch, clone etc and then deal with Eclipse e.g. which plugins to download, why doesn't Eclipse natively support it etc.
Anyway, we won't go into that discussion because Eclipse has too many version and even I have not tried all of them. They might have started supporting Git natively in their latest version or may support in future but today I'll share what will work with most of the recent Eclipse version like Kepler, Juno, or Luna.
Here are the three steps you need to create a Java project from Github in Eclipse:
Step 1 - Download EGit Plugin
Step 2 - Clone the Github repository
Step 3 - Import project from Local Git Repository
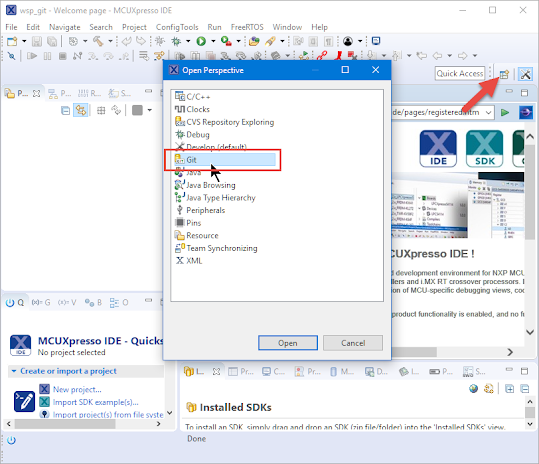
1. Download and Install EGit Plugin
First step is to download EGit plugin which will allow you to perform Git operation right from your Eclipse IDE. It's similar to SubEcipse which you might have used to deal with SVN in Eclipse. You can download EGit From Eclipse MarketPlace.
Once you have installed EGit Plugin, you can see "Git Repository" View. In next step we'll clone a public Github repository like source code for Complete Java MasterClass course by Tim.
2. Cloning Github Repository
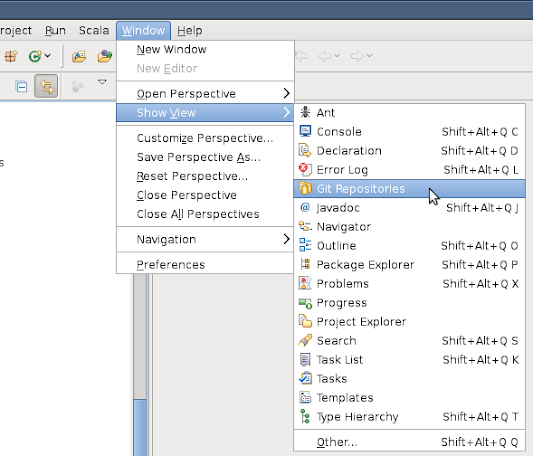
Second step is to Clone the Github Repository. For that you need to open the Git Repository View, which you can do from Windows -> Show View -> Other > Git -> Git Repository, which looks like this:
After that you need to open the Github URL, which you can do in your browser. Now just go and click on that green button which says "Clone or Download". When you click the button you can see the URL for your Github repository, copy that URL, we'll need that to clone that Github project in Eclipse.
Now, go back to Eclipse and click the second button on Github Repository View which says "Clone a Git repository and add the clone to this view". When you will click on that a new window will open which have the option to clone the URI. Just click on that it will automatically copy all the details into respective field e.g. URI, host, Repository, protocol etc.
Though you can use git protocol, I suggest you to use HTTPS or SSH protocol. It's much easy because you can open the same URL in browser and copy paste in Eclipse.
Let's follow this steps to download code for Spring MasterClass course from Github URL:
Once this is finished, you can see the code in your Eclipse repository View. Every Git project has master branch which is like the main version, but some also has branches, when you download the code, if your project has branches, a popup may ask you to choose the branch. Choose if you need to otherwise stick with master.
3. Import Git Projects into Eclipse
Now that we have downloaded the code from Github we just need to import them into Eclipse to directly work with them. In order to import Git projects, click on File > Import > Git > Projects from Git > Existing Local Repository.
This will open Import Projects from Git screen, just click add and then goto the location of the cloned git repository in your machine.

Now click open, finish, then next. Select Java > Java Project, and click next again.
At this point, there are three options.
- Import existing projects
- Use the New Project Wizard
- Import as General Project
- Pick "Use the New Project Wizard".
After that, uncheck the "Use Default location", and click browse and select your local git repository folder where you have downloaded the code. Now, click "Open", and give the Project a name, by default it will use the name of the git repository. Click next, and make sure that the src/bin folders are setup correctly, and click finish.

That's all is needed to create a Java project from Github using Eclipse. As I said, once you install the EGit plugin it become very easy but just to beware of things like Github URL, Cloning Git project, Git repository View in Eclipse and finally importing Git projects into Eclipse. I am sure you can now checkout any Java project from Github and take your learning and work to next level.
Thanks for reading this article so far. If you find steps clear and useful then please share with your friends and colleagues. If you have any issues or suggestions please drop a note and we may fix your problem together.


1 comment :
Is Eclipse still alive? I thought all people moved to IDEA long back and NetBeans and Eclipse is dead already !!
Post a Comment